
Best Result? Yes. Best performance? Well, it’s not as clear.
I thought there was a really good question on the last WODPOD. It nicely reflects everything I have been trying to say about this season and it inspired me to have a closer look at the Swansea game.
Gareth’s question, or at least my interpretation of it, hints at the ridiculous nature of this season so far. Embedded is an assumption that our win over Swansea may not have actually been our best performance of the season. “Hang on?” (my imaginary neutral friend asks) “You’ve won one game in 11 and are suggesting that win wasn’t the best you’ve played – are you mad?”
Well judging by the reaction some have to the analytical base that there may be more to a game than the scoreline then yes I am, but I doubt you take that view if you’ve clicked on to read this.
xG wise this game was by far from our best. According to wyscout the xG for the game was Swansea 2.57-2.69 Stoke, a narrow xG ‘win’ of 0.12. This ranks behind all five of our opening matches as well as the three that preceded the Swansea game. Despite this, 2.69 is our highest xG figure of the season so far and whilst 2.57 is only bested by Leeds romping of us (3.16) it must be taken into account that Swansea’s opener accounted for a whole expected goal of this (due to the combination of the shot saved by Federici which Ayew tapped home).
But there was clearly one element of Stoke’s game that stood out. Our pressing. Using the rudimentary metric PPDA (measuring how many passes the opposition make before a side makes a defensive action, fully explained here) Stoke had the second-lowest figure any side playing Swansea have recorded all season (6.6). Only Leeds had a higher meaning only Leeds effectively pressed the Swans more than Stoke.
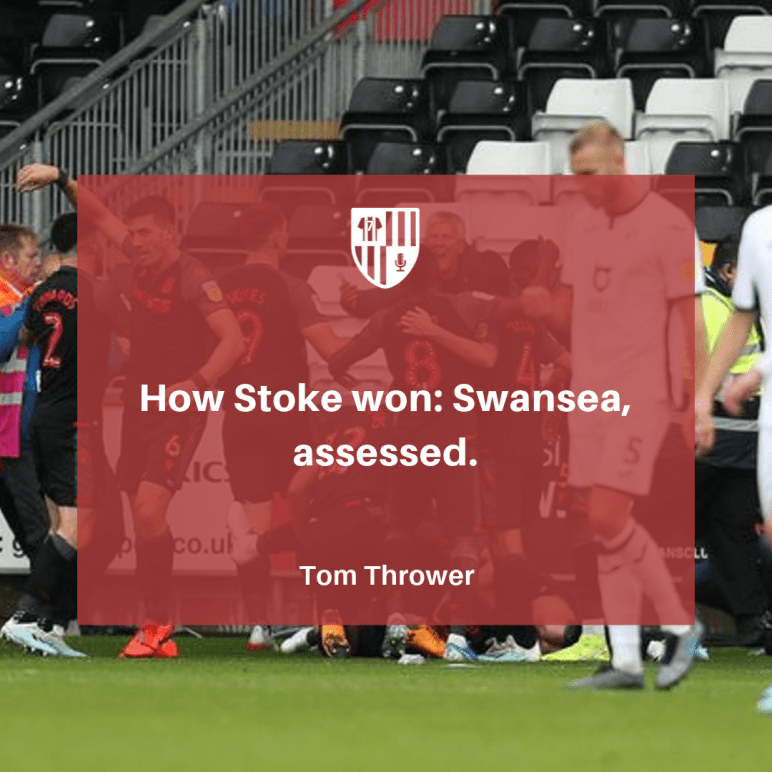
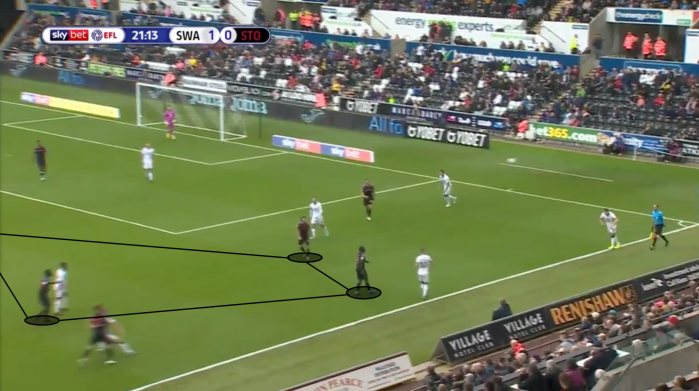
The basis of Stoke’s press (when in Jones’ preferred shape) is a narrow compact diamond that shifts side to side on the pitch. As the opposition move the ball across the pitch the diamond follows it. The trigger tends to be when the ball arrives at the feet of a full back. The diamond, joined by a striker and one of Stoke’s own full backs (normally Edwards against Swansea), will swarm said full back using the touchline as an extra defender to seek a turnover.

In the below image we see the diamond sitting compact and narrow in the centre of the pitch. The aim of this is to get Swansea to move the ball into the wide areas, allowing Stoke to trigger the press.
Again we see the advanced three players of the diamond and two strikers sitting narrow, all within the width of the penalty area, encouraging Swansea to shift the ball into the wide areas.
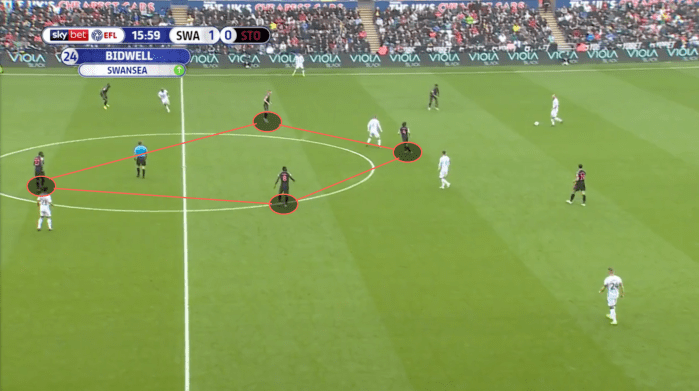
Van der Hoorn shifts the ball across to Rodon who then, under pressure from Gregory, moves it wide to Bidwell. This is exactly what Stoke want. As Bidwell (squared up to the direction the ball is coming in) awaits the ball the entirety of Stoke’s right side moves to him, denying any opportunity to move the ball upfield.
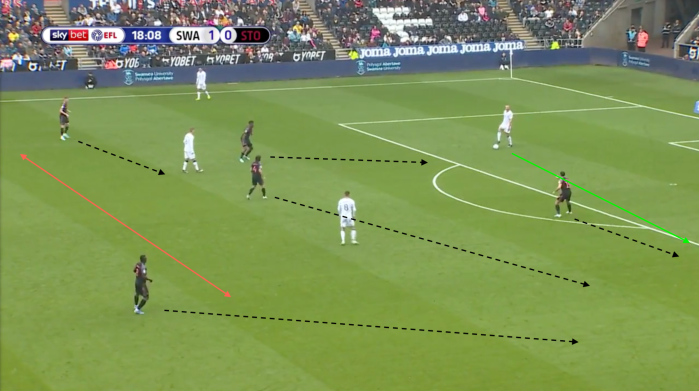
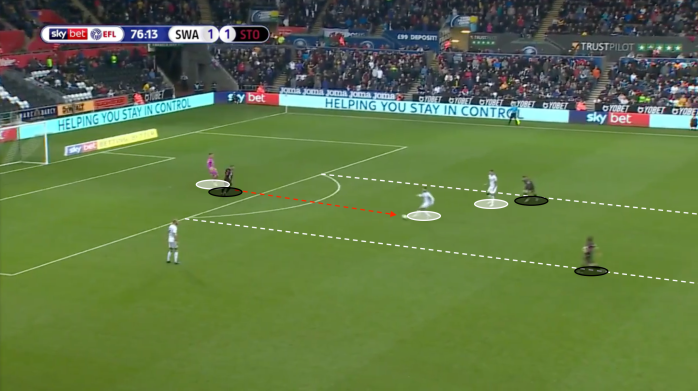
Pressing in wide areas helped Stoke pile pressure on the Swans and ultimately this pressure creating diamond led to Stoke’s equaliser. Using the Swansea throw, deep in their own half, as a pressing platform the entire diamond (with the help of Edwards and Gregory) shifts across to choke their opposition.
A poor control handed the ball to Allen who charged into the box relatively unopposed. This is a subsidiary benefit of the central concentration that the diamond provides. As Stoke’s centre midfielder is occupied by four midfielders the opposition seek to counter this overload by moving the ball and players wide.
If Stoke press successfully and win the ball in wide areas, they can immediately come inside where they have an overwhelming overload. This is exactly what happened from this throw in, allowing player of the season so far Sam Clucas to slam the equaliser home.
After the break there was a clear focus from Swansea to avoid getting caught in these traps out wide and their play became both more central and direct. This also played into Stoke’s hands. As previously mentioned, the diamond packs the centre of the pitch. So as Woodman rolls the ball upfield here, he is innocuously putting the ball into an area where Stoke have a 3 on 2 overload.
Swansea continue to attempt to move the ball up through this central channel but simply hand the ball to Joe Allen.
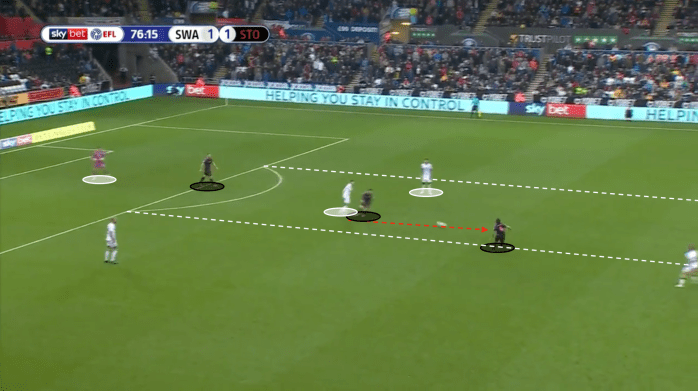
Much as when the ball was won at the throw in Stoke have more numbers in the centre of the pitch than their opponents. Swansea’s fullbacks both pushed wide to affect a build-up in these areas, have been entirely removed by Stoke’s strikers and midfielders staying narrow. The advanced 3 of the diamond alongside Hogan and Vokes are bearing down on Swansea’s centre backs and double pivot in a 5 to 4 overload.
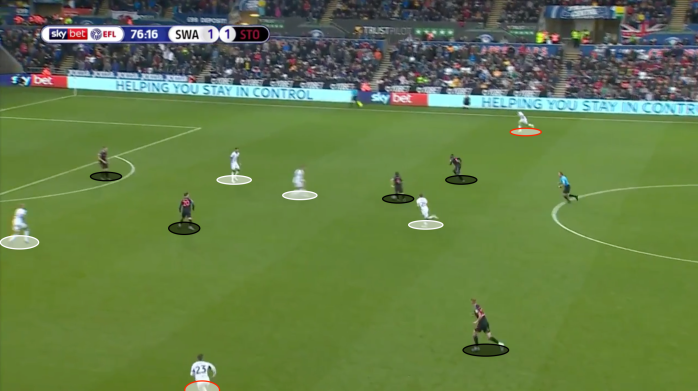
This led to Clucas slamming a volley straight in Woodman’s open arms and should arguably have delivered a more clear-cut chance for Nathan Jones’ men. This pressing is key to the diamond being a success and to implement it against arguably the most confident side in the league should not be downplayed.
Some elements of Stoke’s performance in the Championships last game week were easily the best they have displayed all season. But the ridiculous nature of the Potters season so far means there’s a genuine argument to be made that Stoke have played better than this and not won. But that is all that matters, we won.
Tom Thrower
@ExpectedKilns
